 by Balaji Nursery Editorial Team
How do you plant vetiver grass and get it to grow thick?
You’ve picked your variety. You know where you want to plant. Maybe you’ve already ordered the slips.
Now the question is: what exactly do you do on planting day? And in the weeks after?
That’s what this guide covers. Not the theory. Not the variety comparisons. Just the hands on process of getting vetiver slips into the ground and growing them into thick, healthy clumps.
If you haven’t decided on a variety yet, the vetiver grass price guide covers all 9 options with rates. If you want to understand what vetiver does and why people plant it, start with this complete guide to vetiver grass in India. This article picks up where those leave off.
What supplies do you need before planting day?
Keep it simple. You need fresh vetiver slips, a sharp pair of scissors or a sickle, a bucket of clean water, a spade or khurpi for digging and a watering can or hose.
No special fertilizer needed. No rooting hormone. Vetiver roots naturally and aggressively. Adding chemicals at this stage is a waste of money.
If you’re planting on a slope, add a measuring tape or rope to mark straight contour lines. Eyeballing works for garden borders, but slope hedges need proper alignment to catch water evenly.
One thing people forget: shade cloth or wet jute sacks. If the slips arrive a day early or the sun is harsh on planting day, you need something to keep them covered and moist. Slips sitting in direct sun for even 3 to 4 hours can dry out enough to hurt their survival rate.
How do you prepare slips before putting them in the ground?
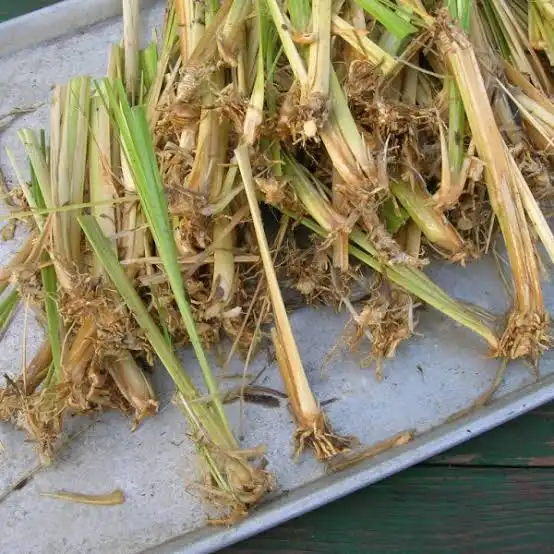
This step separates 60% survival from 95% survival. Most people skip it.
First, trim the leaves. Cut them down to about 15 to 20 cm from the base. Long leaves lose moisture fast through evaporation. Shorter leaves force the plant to put energy into roots instead of keeping a big canopy alive. Use a sharp sickle or heavy scissors. Clean cuts heal faster than torn ones.
Second, trim the roots. If the roots are longer than 5 to 8 cm, cut them back. This sounds counterintuitive, but trimmed roots branch out faster in new soil. Long tangled roots often bunch up in the planting hole and don’t spread properly.
Third, soak the root end. Stand the trimmed slips upright in a bucket so that the bottom 5 to 8 cm sits in water. Leave them for 12 to 24 hours before planting. This rehydrates the roots fully, especially important if the slips have been in transit. Slips soaked overnight consistently root faster than dry planted ones.
If you’re planting a large quantity (say 50,000 slips for a project), you won’t soak each one individually. Lay the bundles in a shallow trench, pour water over them and cover with wet sacks. The effect is similar.
How do you set up the soil for different planting scenarios?
Vetiver grows in almost any soil. But how you prep the planting line depends on where you’re planting.
For a garden border or backyard: Dig a narrow strip about 15 cm deep and 15 cm wide along the line where you want the hedge. Break up clumps and remove stones or roots from other plants. If the soil is rock hard clay, mix in a handful of sand or compost per running metre to loosen it. This isn’t about nutrition. Vetiver doesn’t need rich soil. It’s about giving young roots an easy first path to push into.
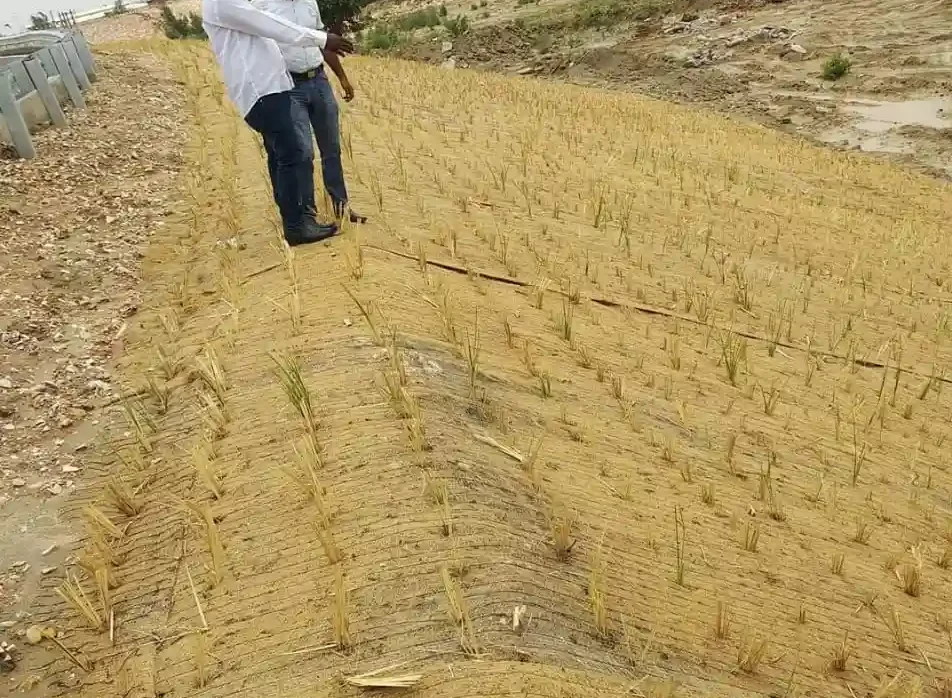
For a slope or embankment: Mark the contour line using a rope and pegs. The line must run horizontally across the slope, not up and down. Dig a trench 10 to 15 cm deep along this line. If the soil is loose or sandy, make the trench slightly deeper so the slips don’t wash out in the first heavy rain. For detailed slope planning, the vetiver erosion control guide covers row spacing and design.
For a riverbank or canal edge: Clear the planting strip of weeds and debris. Don’t dig a deep trench here because loose riverbank soil can cave in. Instead, use a khurpi to make individual holes 10 to 12 cm deep, spaced tightly. Firm each slip well. In flood prone stretches, some project managers drive small bamboo stakes next to each slip to anchor them until the roots take hold.
For oil production on farmland: Prepare the field like you would for any row crop. Plough or rotavate the top 15 cm. Mark rows 30 to 45 cm apart. This wider spacing gives each plant room to develop a fatter root system, which is what you’ll eventually harvest for oil. Knowing which soil type you’re working with helps you decide whether to add sand for drainage or organic matter for water retention.
What is the exact planting method, step by step?
Your slips are trimmed and soaked. Your soil is prepped. Here’s how planting goes.
Step 1. Pick up a slip. Hold it so the root end points down and the trimmed leaves point up.
Step 2. Place it into the trench or hole. The crown (the point where roots meet stem) should sit at soil level or just barely below. Not 3 cm under. Not sticking 2 cm above. Right at the surface.
Step 3. Push the soil firmly around the slip with both hands. Press hard. You want zero air pockets around the roots. Air pockets dry out roots and kill slips faster than anything else.
Step 4. Move to the next position. Space slips 10 to 15 cm apart for hedges and borders, or 15 to 20 cm apart for oil production rows.
Step 5. After finishing a row (or every 10 to 15 metres), water the planted section immediately. Don’t wait until the entire field is done. Slips that sit in dry soil for 2 hours on a hot day while you finish the rest of the field can start wilting.
Step 6. After the whole area is planted and watered, walk back along each row and check for slips that have tilted or washed loose. Straighten and re-firm any that moved.
With a team of 3 to 4 labourers, you can plant about 100 metres of hedge per hour. A large project covering 1 km of slope with 5 rows will take a full day.
What does the watering schedule look like week by week?
This is where most failures happen. People either overwater (rotting the roots in soggy soil) or forget to water during a dry spell in the first few weeks.
Week 1 to 2: Water every single day. Morning is best. The soil around each slip should stay moist but not waterlogged. If you planted during active monsoon rain, nature handles this. But if the rain pauses for 2 to 3 days, water by hand. No exceptions.
Week 3 to 4: Drop to every other day. By now, tiny white roots are pushing into the surrounding soil. You’ll know because the slips will feel firm if you gently tug them. They’re gripping.
Week 5 to 8: Twice a week is enough. New green shoots will start appearing from the base. This is the plant telling you it’s settled.
Month 3 onward: Once a week. Or stop entirely if monsoon is still active. The roots are now deep enough to access subsoil moisture on their own.
Month 4 onward: No watering needed. Vetiver is on its own. Even in dry regions, the roots will go deeper to find water. The only exception is an extreme drought lasting over 2 months during the first year. After the first full monsoon cycle, the plant is self sufficient for life.
What does growth look like month by month?
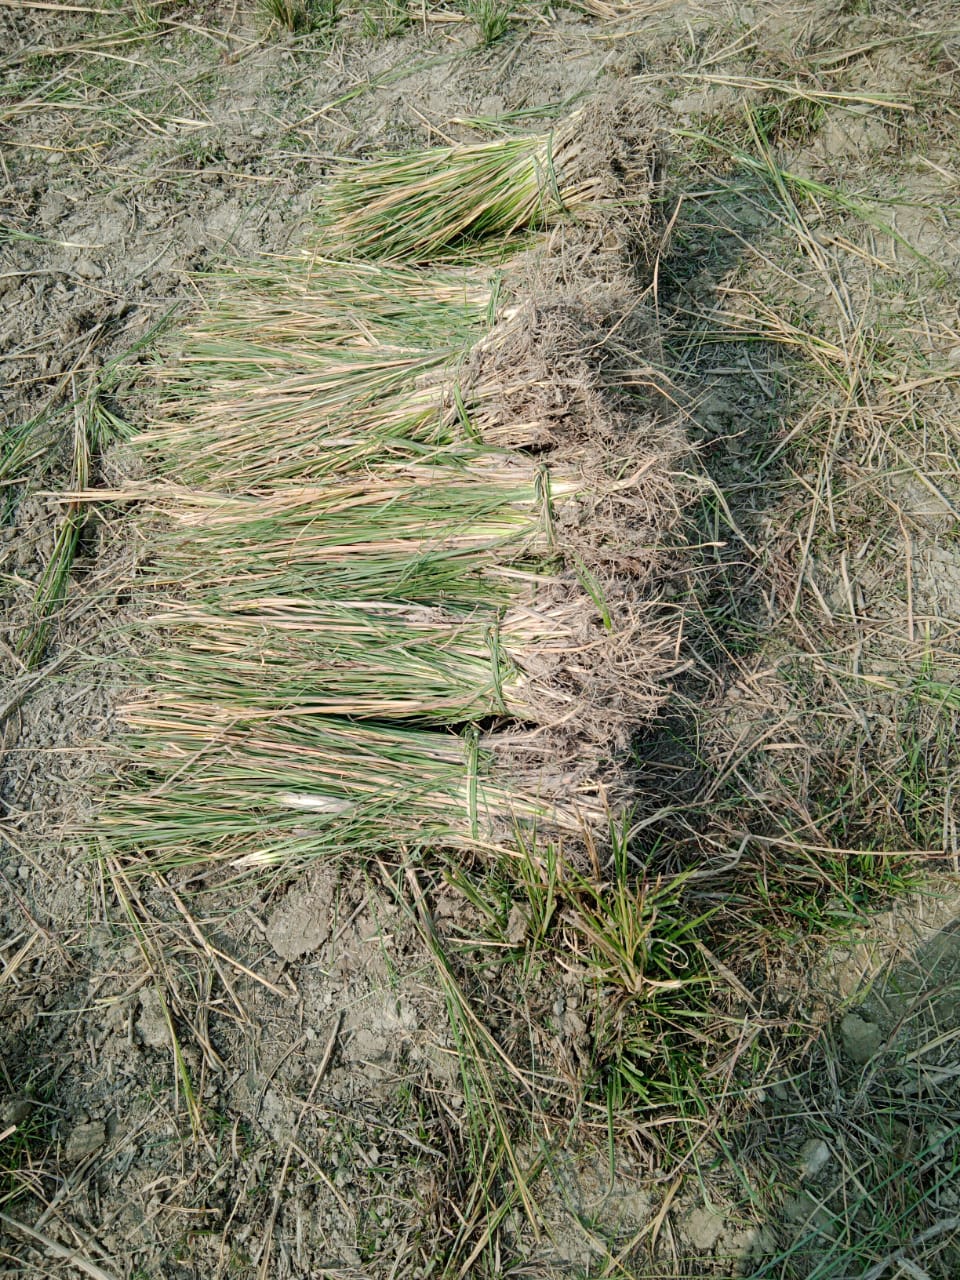
Knowing what to expect helps you avoid panicking in the early weeks when nothing seems to happen above ground.
Week 1 to 3: Nothing visible. The slip looks the same as the day you planted it. Maybe a bit droopy. This is normal. All the action is underground. Roots are pushing downward and outward.
Week 3 to 5: First new green shoots appear at the base. They’re thin and short. The original trimmed leaves may turn slightly yellow at the tips. Don’t worry. The new growth is what matters.
Month 2 to 3: New leaves grow taller. The clump starts filling out. Each original slip sends out tillers (side shoots) that make the clump wider. By month 3, individual plants in a hedge start touching their neighbours.
Month 4 to 6: The hedge looks like a proper green wall. Leaves reach 50 to 80 cm tall. Underground, roots have pushed 1 to 2 metres deep. The plant is now firmly anchored and self sustaining.
Month 6 to 12: Full growth. Leaves can reach 1 to 1.5 metres if untrimmed. Roots go 2 to 3 metres deep. The hedge is dense enough to trap sediment on slopes and create natural terraces.
Month 18: For oil production varieties like KS1 (Rs 1 per slip) or Gulabi (Rs 0.80 per slip), this is when the first root harvest becomes viable. Younger roots produce less oil, so patience pays.
Can you grow vetiver in pots or raised beds?
You can, with the right expectations.
Vetiver’s superpower is its 3 to 4 metre deep root system. In a pot, it’ll never reach that. So pot grown vetiver will survive and look nice, but it won’t perform like ground planted vetiver does for erosion or oil production.
That said, here’s how to do it well.
Pots: Use a container at least 30 cm deep and 25 cm wide. Terracotta works better than plastic because it breathes and prevents root rot. Fill with a 60/40 mix of garden soil and coarse sand. Plant one slip per pot. Water daily for the first 2 weeks, then twice a week. Place in full sun (6 to 8 hours). The leaves will grow upright and give off a mild khus fragrance, especially after rain.
Raised beds: This is a better option for terraces and rooftops. Build or buy a bed at least 30 cm deep. You can plant slips 15 cm apart along the length. The roots will spread horizontally since they can’t go straight down, giving you a dense green border. Raised beds also drain better than pots, which vetiver likes.
Balcony planters: A long rectangular planter (60 cm x 20 cm x 25 cm deep) can hold 3 to 4 slips. These make a nice fragrant screen along a balcony railing. Trim the leaves to 40 to 50 cm every couple of months to keep it neat.
The honest take: if you have even a 1 metre strip of ground anywhere, plant vetiver there instead of a pot. Ground planting gives 10x the results for the same slip cost.
What if some slips die after planting?
Expect 5 to 10% loss in the first month. That’s normal even with perfect technique. Some slips were weaker in the bundle. Some got damaged in transit. Some landed in a pocket of badly drained soil.
How to spot dead slips: pull gently on the leaves after 3 weeks. If the slip lifts out of the ground with no resistance, it didn’t root. A live slip will resist your pull because the roots have already gripped the soil.
Replace dead slips within the first 2 months. After that, the neighbouring plants will have filled in and new slips planted between established clumps will struggle for light and space.
For large projects, order 10% more slips than your calculation says you need. At Rs 0.80 to Rs 3 per slip (depending on the variety), the cost of extras is negligible compared to coming back later for a second round of planting.
If your loss is above 20%, something went wrong. Usually it’s one of these: slips were too old (sat for more than 4 days after harvesting), soil was bone dry for the first week, or slips were planted too deep (crown buried more than 2 cm under the surface).
How do you keep vetiver looking neat after it grows?
Left alone, vetiver leaves grow 1.5 to 2 metres tall. For slope erosion projects, that’s fine. Let it grow wild.
For gardens, borders and compound walls, trim the leaves to 40 to 50 cm twice a year. Use a sickle or hedge trimmer. The cut leaves make excellent mulch for your other garden plants. Just spread them around the base of your shrubs or vegetable beds.
Don’t throw the trimmings away. Dried vetiver leaves are used to make traditional khus curtains and mats. In rural areas, farmers sell the dried leaves as a side income.
One thing you never need to worry about: vetiver spreading where you don’t want it. Unlike runners like Bermuda grass, vetiver grows in tight clumps. It stays exactly where you planted it. That’s one reason government green projects prefer it for public spaces.
Does the planting method change by region?
The steps are the same everywhere. What changes is the timing and the variety.
In the north (Delhi, UP, Bihar, Rajasthan), plant in June or July when the monsoon arrives. Avoid planting after September because the dry winter gives young roots no moisture to establish.
In the south (Tamil Nadu, Karnataka, Kerala), you get two monsoon windows: June to July (southwest monsoon) and October to November (northeast monsoon). Both work.
In the northeast (Assam, Meghalaya), monsoon is longer and heavier. Plant anytime from May to August. The risk here is waterlogging in low lying areas. On flat ground, raise the planting bed by 5 to 10 cm to keep the crown above standing water.
For arid regions like western Rajasthan or Kutch, Kesari (Rs 1.50 per slip) handles salinity and drought stress better than other varieties. Plant just before the monsoon arrives and water heavily for the first 3 weeks. Once roots are in, the plant manages on its own even through 8 to 9 dry months.
For a broader view of how climate affects grass choices across India, this regional guide helps with planning.
Ready to start planting?
Trim the slips. Soak overnight. Prep the soil. Plant tight. Water for 3 weeks. That’s the whole method.
Balaji Nursery supplies all 9 vetiver varieties with delivery in 1 to 3 days anywhere in India. Rates start at Rs 0.80 per slip (Gulabi) and go up to Rs 3 per slip (Dharini). Popular picks like G22, KS1 and Simriddhi cost Rs 1 per slip.
Call 8766234417 or 9354173113. Tell them your variety, quantity and location. Their team can also help you calculate exactly how many slips your project needs and which variety suits your soil and climate.
Last Updated on 2 months ago by Balaji Nursery Editorial Team

- How do you pick the right planter size so your plant actually thrives? - October 10, 2026
- Tulsi Plant Direction as per Vastu: Where to Keep It at Home - October 3, 2026
- Which garden planter is right for your home, balcony or terrace? - October 1, 2026